Showing posts with label Indigo Salon. Show all posts

Thursday, February 27, 2014

Women and Girls in Sports: A Resolution and a Wonderful Memory

To the left is a picture I took yesterday of my niece and I at the Washington State capital building. We joined my roller derby team, the Oly Rollers, in honoring Women and Girls in Sports.

This picture is very important to me for a few reasons.

1. My life is full of busy. I sometimes forget how important it is to stop and take time to spend time with the children in my life. I forget that she, her sister, her brother and her cousin all love to spend time with me. I spoil them with what I can, I require dance parties in the car, I apply "earmuffs" that I was told yesterday do not really work that well AND I make sure to embarrass them every chance I get. I forget that those are all job requirements inherent of the title "Aunt". I love them. This photo is a reminder of how important that time is, and that I need to make an effort to allow for more of this in my and their lives.

2. One of the super important senate people reminded me that I'm a roll model. WHAT?!? ME?!? I guess I can handle that!!! I am a business owner, an independent stylist, a skater, an Aunt and a role model. If I'm not careful, she may pick up on these things and then where would the world be? More awesome?

3. Hair... I find it important to remind my niece that she is perfect just the way she is. During our day-venture, she remarked a few times that she should have done something different with her hair. I thought it was perfect and I made sure to let her know that. The moments I get remind her of that are very important to me. I also do my best to apply this thought to my appointments and interactions with clients. I get the opportunity to create with hair. The many things I am able to do are as a result of what you and I both bring to the table. Your hair is an expression of who you are and I do my best to take your ideas and my expertise and make your expression an tangible reality. The way you wear it, love it and help create it make it perfect!!

This picture represents many things. I love that it is of the two of us on a day-venture. It makes me giggle that you can see my selfie arms in the reflection of our sunglasses. I love that we are wearing sunglasses in the PNW during a mild but amazing Winter day. I love her smile. I love that I get to share this photo and my reflections with you.

Wednesday, January 29, 2014

Sometimes You Swing and Miss

There isn't a stylist in all of the worlds who could tell you that they've hit it out of the park every time and I would be lying if I proclaimed to be an exception to this rule. I am human and, to be quite honest, it has taken me some time to come to terms with the fact that each and every one of you know this. Sounds kind of silly right? I know...  Lucky for me, I have THE GREATEST CLIENTS ON THE PLANET and because of this, I have been allowed the opportunity to become comfortable in my own humanness to say, "You know, I'd like to give that another try."

Yesterday, I did not hit it out of the park. I was a little bummed that the color I applied didn't do what I hoped it would and with a snafu like that, you have two choices; let your client walk out with a not so up to par do OR ask your client if they'd like to let you have another shot at it. I chose to do the latter and from my experience making the choice to recognize your own humanness is definitely the way to go.

Thank you all for recognizing my humanness and thank you for being there to help me recognize it as well. It is my job to make sure that you all have the greatest hair of your lives and I appreciate the opportunity to make that happen. Sometimes it happens, sometimes it doesn't but I am so grateful that you all have allowed me the chance to be human and make adjustments when snafus arise.

Wednesday, January 15, 2014

Do Blondes Really Have More Fun?!?

I honestly don't know the answer to that question but what I do know is that the path of discovery Mirela and I took to create this beautiful color has been a fun adventure for the both of us.

Mirela came to me a few years ago with box colored hair proclaiming that she wanted to be lighter.... and eventually blonde!! Yeah... I know!!!! Fast forward to our most recent appointment and you can see that we not only got her lighter but we've stuck with it. As time has passed, she has been differing shades of blonde but this is by far our favorite.

Mirela is naturally a level 6 with a heavy amount of yellow pigment. I lift her with Mask Bleach and 20 volume in a full foil. Once she's processed, I use the newly concocted Mask 10,12 with 40 volume and a processing time of about 15 minutes to break her base and also tone her blonde and lift out a little bit more of her natural pigment.

I styled her with Oi All In One Milk and More Inside's Curl Building Serum blowdrying with a smaller, vented round brush to give a loose curled texture to her style. She told me as I was pre-drying that she was going to go grocery shopping and then head home to crash after a long day of work. I assured her that she'd have the best hair at Fred Meyers!!! Hehe!!

Sometimes, it's not about the color we've done on your hair in the past, it's about the journey we've taken to get to the best color you've ever had. I love taking that journey with my clients and love even more when "the best color you've ever had" happens more than once.

Wednesday, January 8, 2014

BEST.COLOR.CORRECTION.EVAR!!!!!!!!!!!

So... Let's just gaze at this picture for a minute and bask in its amazingness....

Ok... Let me know when you're done.

Well... I guess the amazingness deserves a little explanation in that this is far from the color it used to be.

This is my friend Rachel, a natural level 7. I have been coloring her hair black for a number of years and before I got my hands on her, it was colored by someone else (but we won't talk about that....) A few months back she told me that she wanted to go lighter and closer to her natural but wanted to be a different tone. When she told me she wanted to be copper, I freaked!!! I got so excited I did an internal happy dance. The prospect of giving her a new look excited us both and we talked about the process and when we should do it. We decided that staying a raven haired goddess through her wedding was the best idea and eventually came to the agreement that we would take the plunge after the New Year.

Leading up to the day we sent texts back and forth and discussed all of our options. The conclusion we came to was that it would probably be the most awesome thing ever but if it wasn't, we could always go back to black. The day came, she showed up and we got right down to business.

The process was long but completely worth it. After lifting her hair to a banded level 7, we decided that we would do two tones of copper since we really couldn't decide on which we liked better. I parted out a block to go in her perimeter and applied Mask 7,43 rood to ends knowing that the color in that tube was dense enough to give her even coverage. I had to get a little sciencey with the top section and take into consideration the copper that was already happening in her previously colored but lightened lengths. Since the desired end result for this section was Mask 7,34, I applied a straight formulation of that on her root, reformulated for her very copper mid lengths using what remained in the bowl (about 15g of color) and mixing in straight 7,3, applied and in her ends mixed and new formulation of 7,34 because her ends were more shallow than the mid section.

Did your brain explode?!? If you are a colorist, you totally get me. If you are not... well think of unicorns and rainbows and that should make your brain feel better.

What you see pictured above is the end result. After rounds of lifting to get her previous color out so we could put her new color in, this is what we got. What amazes me the most is that it is remarkably even, shiney and still a very strong strand of hair.

Due to the magic of Davines' Mask Color, I was able to make this awesomeness happen for Rachel. We were both so pleased with the end result that our faces hurt from intense smiling. Seriously.... my face is still sore from the over use of my smile muscles!! Ha!! I gave her a fat stack of my cards and people have liked it so much she's already had to ask for more. The greatest thing to come out of this experience is knowing that I was able to give Rachel EXACTLY what she wanted, she LOVES it and it's a wearable color that will allow her the freedom to play with copper tones or grow out her natural if she so chooses with less hassle than staying dark.

BEST.COLOR.CORRECTION.EVAR!!!!!!!!!

Wednesday, January 1, 2014

A New Year, A New You...

I'm very excited about what 2014 has in store. My first full calendar year of business is behind me and the second has a bright, bright outlook. I've spent the last year working hard and cultivating ideas with the intention of making sure you guys all know just how much I appreciate you.

One of few ideas is the Indigo Elite Membership program. A few of you asked when I first opened if I would be creating something of the sort and here it is!!!

This program is not only designed to create savings for each and every one of you, it has rewards built into it that honor things you already do. The next time you're in, make sure you ask me about what it means to be a member and how you can go about being among the first to take advantage of a program that's designed just for you.

How do I earn Elite Rewards?
· Prebook (1 point)
· Purchase product (1 point)
· Book an add on service (1 point)
· Refer a new client (5 points)
**each point is worth $1 and can be used toward any regular priced product purchase**

Can I earn Elite Reward points if I am not an Indigo Elite Member?
YES!!!
 

Thursday, July 18, 2013

Cool Stuff....

I have had the true blessing of being able to be a part of some really cool creative stuff in Tacoma via working with local photographers and friends who have projects that need hair and makeup etc. Doing hair for this photo shoot will be one of the most memorable, simple and exciting styles I've had the pleasure of doing thus far.

Pictured is Elizabeth, Alaska native and author of Delightfully Tacky. Besides writing a blog and being absolutely gorgeous she has the most amazing natural curl I've had the pleasure of working with. After talking to the photographer, Willow of Willow's Photography, and consulting with Elizabeth we settled on rocking her natural curl while adding a little edge.

By taking a triangle shaped section and cornrowing it up and back, I was able to give her a "faux undercut" while giving it texture with a fat braid. To get her curl to be as GIANT as possible. I applied Davines' Volume Mousse along with Oi (because duh...) to give moisture and internal volume and diffused. I relied on Volume Mousse to plump everything up and give me a solid foundation to then take things up a notch with NO. 14 Sea Salt Primer. When her hair was mostly dry, I sprayed No. 14 Sea Salt Primer very generously throughout her hair and diffused until completely dry. I believe this is also when I asked her to stand up and flip her hair over so I could get volume in the crown area (aka the funnest way to add volume to your hair EVAR!!!) To add a little more "guts" to it all, I sprayed another generous amount of No. 14 Sea Salt Primer and diffused.... and then did it again.... and maybe again!! Ha!!!

Layering textured product on top of itself is one of my favorite ways to give hair volume and that 2nd day hair feeling without having to wait for that second day. No. 14 Sea Salt Primer is one of the more matte products that I like to do this with and probably the best smelling of them all as well.

Please, take a second or 500 to check out Elizabeth's blog and Willow's as well and if you come across either of these lovely ladies in your goings on in Tacoma, make sure you tell them hi for me!!!

Thank you and have a good night!!!! **drops mic like a rock star, bows, walks off stage**

Friday, July 5, 2013

Mermaid Hair and Smurf Bangs

Meet April. She's one of my younger clients, who like most kids, likes fun hair but can't do it during the school year because of the silly dress codes schools have now a days. When I got text from her mom that April wanted "fun color", I was super excited.

Despite poplar belief, I do more "normal hair" than I do "punky hair" so when I get a chance to do it, I giggle and dance and get super excited!!! It's not so much that "punky color" is more creative, it's just a different creative outlet.

For April, her mom sent me a picture of a blue to teal 'Ombre and I leaped with joy!! How fun!!!

This is probably the most fun I've had doing an 'Ombre EVAR!!! I opened up the cuticle with a quick bleach wash to ensure longevity and also because April's naturally about a level 8 or 9. I chose the back combing method because the colors she wanted are so vibrant and needed to be solid instead of blended like I've done in the past with the Flamboyage strips.

After applying, combing out and rinsing, the expression on April's face once we blow dried and cut her bangs was PRICELESS. Her over all reaction was amazing!! She danced around Indigo picking up every mirror and checking herself out in every reflective surface!! While I was shampooing her mom's hair, I caught her moon walking across the salon floor while dancing and singing!! I sent April's mom a text the next day to see how April was doing and it was reported that she was still dancing, singing and checking her self out every chance that she could!!! Best client reaction EVAR!!!! Hehe!!!

Rock on April!!!


Thursday, April 18, 2013

Indigo's Half Bday!!!

Oh man!! I am super excited about this event!! This is the first of many I plan to have here at Indigo, so I'm guessing that this will be a learning experience as well as lots of fun times.

If you've taken the time to read the lovely flier to the left, you'll see that I've got awesome stuff planned for this evening; raffles, hair tutorials, door prizes etc. So much to plan, so little time....

At this point, I think I'm most excited about the raffle items. So far, I have 4 local businesses that have donated items to be raffled off to help raise funds for my GoFundMe project. I am completely humbled by the support I've been getting from the people in our lovely community and am so grateful for the generosity I've been able to witness.

As days go by and the planning plot thickens, great ideas keep popping into my head and with the help of a client, friend and donatee we've been able to figure out a way to allow those who can't attend the event bid on raffle items from afar!!! Super cool right?!? OMG... I get super excited about stuff like this and to most, it's just a thing... I get excited over things!! Haha!!!

Well, I guess I should explain how the raffle will work. Duh...

Indigo's Half Bday Raffle:

1. Items up for raffle will be displayed throughout Indigo. Each item will have its own separate drawing.

2. Raffle tickets can be purchased for $1 each, 12 for $10 or 25 for $20.

3. Raffle tickets can be purchased by cash or any major credit card during the duration of the event and until winners are announced.

4. Winners will be announced at the end of the evening. You do not have to be present to win.

How to Enter the Raffle Drawing for Items from Home (for raffle items will only be taken during the time of the event)

1. Click here to go to Indigo's GoFundMe Project page during Indigo's Half Bday event, May 1st between 6pm-8pm.

2. Click the donate button, fill in the fields accordingly.

3. In the comment section, list the item you would like to enter to win. If you would like to enter to win more than one item, list the items and how much you would like to go towards each item.

Sounds easy enough right?!? Right!!!

So... For those of you who can't come but would still like to enter to win one of the super awesome raffle items, here's your chance!!!!

Wednesday, March 27, 2013

Indigo's YouTube Channel

For those of you that don't know, Indigo has its very own YouTube channel!! What?!? Yeah... I know!! Hehe!!!

Currently there are 5 videos up which have all been created on a whim. I don't feel like I'm some sort of YouTube video creative mastermind but I do realize that there is a need for detailed instruction on how to do things that you should be able to access from home.

As time and creativity permit, I will be adding to this collection of videos. the plan is to create videos that speak to the needs of my clients from the point of view of a person doing their own hair or makeup.

If you have any suggestions for future videos, please feel free to leave a comment below. Let me know what you would like to learn!!

Also, above is one of the latest videos I've posted that shows you how to, from wet/curly to end result, create a pompadour. This video seems to have garnered the biggest response and currently has the most views. I even got my first compliment on it by a non-Indigo type person!! Yay me!!!

Anywho...

I thoroughly hope you enjoy it!! Make sure you subscribe to my YouTube channel so that you can stay current when new videos show up :D

Now to decide what to film next....

Tuesday, March 19, 2013

What Can I Say... The OI Got Me!!!!

I'm not sure why it's such a surprise to me when I return from an Educator Update and feel so energized and excited about Davines!!! I am so excited about what I've learned over the two days I spent with my colleagues. I can't wait till I can share it with whoever on this planet is willing to listen to me nerd out about the company and products I love so dearly. There are SO MANY good things to come!!! I think I might burst!!!

There are some details that emerged during the update that I CANNOT divulge but what I can share with you is my experience with the new OI!!! THIS. STUFF, IS AMA-ZA-ZING!!!!! I have to tell you, the only reason I can gush about this before its US launch is that it has already launched in Italy and the press is out!! Oh BOY!!!!

Ok... Gush time!!!! Once it finally arrives in the US we will have 3 new products; OI Shampoo, OI Conditioner and OI All In One Milk. I was the first person in the room to wrap my greedy little hands around each bottle and upon receipt, about DIED!!!! I was floored just by the smell, the packaging and its all around awesomeness!! When I sprayed some of the Milk into my hands and ran it through my hair, it served as a reminder of why I love this company so much.

I cannot express how wonderful it is to work for a company that is constantly on a path of growth. There's always a new idea, a new product, an innovative new tool and a quality and excellence that is hard to find in any other hair care company. You may have heard me rant and rave about some of the product lines that are out there. The reason I can do so with such confidence is because I work for and utilize the products of a company that TRUMPS the competition in its efforts to be earth friendly, honest, human conscious and just plain and simply put, beautiful.

If you haven't had a chance yet, please take the time to visit the Davines website to learn more about the many ways this company makes efforts to be as amazing as it is. Hopefully this will give you some insight as to why I can't help but be so madly in love with the tools I have to use and what I do.

Wednesday, January 16, 2013

How I ReUse My Essentials Bottles

As I spend my days gabbing with clients and educating in other salons, one of the facts about Davines I like to speak on is the fact that as a company, Davines is very Earth conscious. I get a bit giddy when I get to tell people about Davines' association with Lifegate and how specifically the Essentials bottles are recyclable and reusable. I purposefully buy Essentials for myself in different sizes so I can use them around my home and here at Indigo. I know right?!?

Alright!! It's nerd out time!!!

Essential Hair Care is Davines' basic cleansing and conditioning line. These are the "essentials" you utilize on a daily basis to give your hair the foundation it needs to be healthy and able to be beautifully styled. The bottles themselves are transparent, what you see is what you get. If you need moisture, you would pick up Momo shampoo and/or conditioner for the day. If your hair is curly or you would like it to be straight, that hair needs the love that only Love Curl Enhancing or Love Smoothing can provide.... I could go on. You will notice that the names of the are short and sweet, like nicknames. That's because that's exactly what they are. Each product is given a nickname in accordance with what it does (Momo = moisture). Essentials is the first line within Davines to be completely zero impact, the second being Su, with the hopes that soon all of Davines will be as well. The bottles are made of PE/PET plastic (the same plastic that water bottles are made of) which is a food grade and safe plastic to recycle and reuse.

OK... So how would you go about reusing these bottles?!? The possibilities are ENDLESS!!! Seriously, when I find a new way to use them, I freak out and immediately to an "I'm so proud of myself" happy dance for at least 30-45 seconds..... SERIOUSLY!!!

What I have pictured below are just a few ways I use my Essentials bottles at home and at Indigo:


1. GARLIC!!!- I use A LOT of garlic when I cook so it's easier for me to peal a bunch at once and store it in the fridge. This, by far, has been my favorite way to store the stinky stuff in the fridge cause the screw on top allows for an airtight seal meaning no funky smell AND my garlic stays fresh for quite some time.

2. Lotion- I am very particular about the lotion I use on my skin due to skin sensitivities and what not. This means I can't just pick up any good smelling lotion and throw it in my purse for travel and daily/obsessive applications to hands and other "ashy" areas. When I finally found a lotion that worked well with my skin, it did not come in a travel size option so..... Essentials to the rescue!!!! After emptying a purposefully bought travel size Essentials bottle, I quickly washed it out and filled it with my fav, non irritating body lotion for purse convenience and travel. This is also how I travel efficiently with other products that do not come in FAA regulated travel sizes yet.


3. Vinegar- I am a klutz when it comes to pouring stuff out of big bottles. So, instead of risking the possibility of a spill I transfer the contents of my large bottles of things like vinegar and laundry detergent to liter size Essentials bottles. This makes for easier and less spilly pouring and is awesome for easy storage in the various places I use vinegar (laundry, all purpose cleaning, 1/2 water 1/2 vinegar mixture for pet accidents etc.).


4. Waxing Space- To save space at my "waxing station" located next to the shampoo bowl, I utilize a Momo Conditioner container to house the waxing sticks, q-tips (to dry wet ears after shampoo), trimming shears and tweezers. I pre-cut my own wax strips to the size I like and they live in an Authentic Replenishing Butter jar (not Essentials but totally reusable). I really enjoy how decorative it makes the space look and how each container brings its own sense of charm to the space.


Now that you've seen what I do with my Essentials bottles, I hope this gives you ideas on how to use your empty bottles in the future.

Oh!!!! I forgot to mention!!! I also store leftovers in a variety of containers, put bobby pins and hairpins in an emptied Momo Fluid bottle and made myself a little after derby anti-stink/germ kit out of a Dede Mist bottle, Momo Conditioner container and Solu Shampoo bottle... Like I said, happy dances and excitement all around when I figure out new ways to use these awesome containers!!

Cheers and happy reusing!!!

More photos taken after the original post:


I use a Momo Fluid bottle to hold hairpins and bobby pins in my "hair stuff" drawer at home.

This a homemade dog shampoo I made and now store in a Melu Shampoo liter.

Wednesday, January 2, 2013

Make Up How To!!!

Make up, to some, is a scary thing. I feel like (and sometimes see) that there are a number of people who struggle with make up application. Whether it be a day-to-day face, day-to-night transition etc, it truly doesn't have to be complicated. I often think of applying make up as art so when I say, "I'm going to paint my face" I literally mean that my face is my canvas and my make up my artistic tools. Here are 2 tutorials for some very basic make up applications. One is a "5 Minute Face" and the other a 2 minute-ish "Day To Night" transitional look. Take what you can and incorporate them into your routine. If you truly have questions on how to apply your make up and need hands on help, feel free to book a make up lesson and we'll cover all the ins and outs of working with your canvas.

PS- I feel like I should also say that I REALLY do not like the thumbnails that YouTube chooses for you. If there is a way to choose my own, will someone please let me know... Otherwise, you're stuck with these awkward faces!!! Hehe!!!

DON'T LOOK UP MY NOSE!!!

Friday, December 28, 2012

My Authentic Routine

People ask me all the time what I do to keep my skin in good health. Authentic from head to toe... SERIOUSLY!!!! It's like my Windex!! Though some would like to believe I wake up with a commercial like glow, it doesn't come without using the right product and paying attention to what my skin needs when it needs it. Authentic has made this very simple.

Ok... I've got to nerd out for a second so that you know it's not just magic and why it really works. In short, it's all in the ingredients (duh right?!?); Carthame (safflower) Oil, Jojoba Oil, Shea Butter etc. All of these yums are crammed into jars of awesomeness for us to apply to our hair, face and body, all designed with the sole purpose to make us glow from head to toe. Carthame oil was used in ancient Egyptian milk baths and is a long used topical ointment for an array of skin ailments and burns. Jojoba oil mimics the oils we produce naturally. Shea butter is high in vitamins A and E giving it amazing anti-aging properties and has been linked to boosts in collogen production... I could go on FOREVER!!! With their powers combined, they give your skin the opportunity to perform at its best; Carthame oil resolves any topical issues you may have, jojoba oil keeps the skin "fed" to ensure your skin doesn't  FREAK OUT and over produce any unneeded oils, Shea Butter hangs out to make sure our skin stays fresh, young and ready to party.... Are you ready to party?!?

Ok... So here's how I use it:

Authentic Cleansing Nectar- I wash my face and body with it in the shower and depending on my hair's needs, will shampoo with it on occasion. For my hair typically stick to Melu and Love for heat protection and straightening but in a pinch or if I'm wearing my hair curly, I'll use the nectar of the gods and it gets the job done. The Cleansing Nectar leaves my skin feeling refreshed and not stripped and tight like some cleansers tend to.


Authentic Replenishing Butter- I use this as a daily moisturizer for my face and body. It is BY FAR my top favorite moisturizer for my face. It's not heavy at all and leaves my skin still feeling like skin.


Authentic Moisturising Balm- Eye mask, make up remover, curl cream, eczema and dry patch healer, scratchy elbow cure, tattoo cream, floor burn ailment.... should I go on? You can use this for just about anything!!! I sometimes use in in place of or in conjunction with my Replenishing Butter when the weather is extra dry in the Winter. It gives my hair enough moisture that I can use it as a curl cream and add it to flat ironed hair when it's looking a little parched. This is probably my favorite of all of the Authentic family due to its versatility and the fact that it's clearing up the wrinkles that have started around my eyes. I would make sheets out of the stuff and sleep in them if I could!!!

Authentic Nourishing Oil- I consider Nourishing Oil to be my foundation for all things Authentic. It's the purest form of what makes Authentic so awesome, the don of the Authentic Family. I use this my in epsom salt baths (when I get a chance to take one) for the scent as well as the skin soothing properties. It serves as a back up when I run out of my Butter or Balm and is the "go hard" for any ailments that need resolution that the Butter and Balm couldn't take care of.


 Again... I could go on and on about Authentic. It's a true and honest way to take care of your skin, a representation of the intentions of Davines as a company.... It is my crack... Hehe!!!


Thursday, December 13, 2012

Pinterst + The Holidays = Awesomesauce!!!

Pinterest has swept the lands and I have to admit, I'm quite obsessed!!! ....By obsessed I mean that I fell asleep pinning last night with my phone in my hand... I admit that's a little extreme but I just can't help myself!! I'm going to need a support group soon so if I go missing any time in the near future, I'm at the Betty Ford equivalent for recovering "pinning" addicts.

I guess I should explain...

I'm a very visual and kinesthetic person. If I can't see it, touch it or do it, I have a hard time learning how to complete it. Pinterest is fantastic for this in that I can see pictures of stuff that I like, hair related or not, and learn how to make it happen!! Exciting right?!? I love this particularly for the holidays because I love to bake for my friends and there are A MILLION hair ideas on the interwebs that I would love to try. This allows me to create boards of stuff that inspires me and hopefully inspires you. It's a hub for clients to point and say "Let's do that!!!" which makes my job that much easier!!

I've created quite a few boards (obsessed) including a board called "Inspiration" of pins I've found that spark my creativity and a board called "DO Try This At Home" of pins I think that my clients would be interested in trying at home (hair, skin care and other random stuff :D). I also have a "Hair" board of pictures I've taken of my work while here at Indigo.

Please feel free to follow any of my boards or all of them for that matter. I pin like a mad person so I guarantee you won't be bored!! If you're worried that you might be enabling me, you will be but realize that the pinning will happen no matter what and, let's face it, you don't want to miss out on this brand of awesomeness... You just don't!! Haha!!!

Follow Indigo: Indigo253

Tuesday, December 11, 2012

Indigo's First YouTube Video

So... I decided instead of just being so proud of the fact that I can now sew my hair when it's curly, I should make a video of it and share it with the entire world!!! Here it is!!! This is my first tutorial video and I'm doing my own hair so if not for anything else, watch to catch the awesome faces I'm making throughout. Next time I make one, I'll try and set music to it but for now, without sound will have to do. Enjoy!!!

Wednesday, December 5, 2012

It's Called a Filler.... I Guess :D

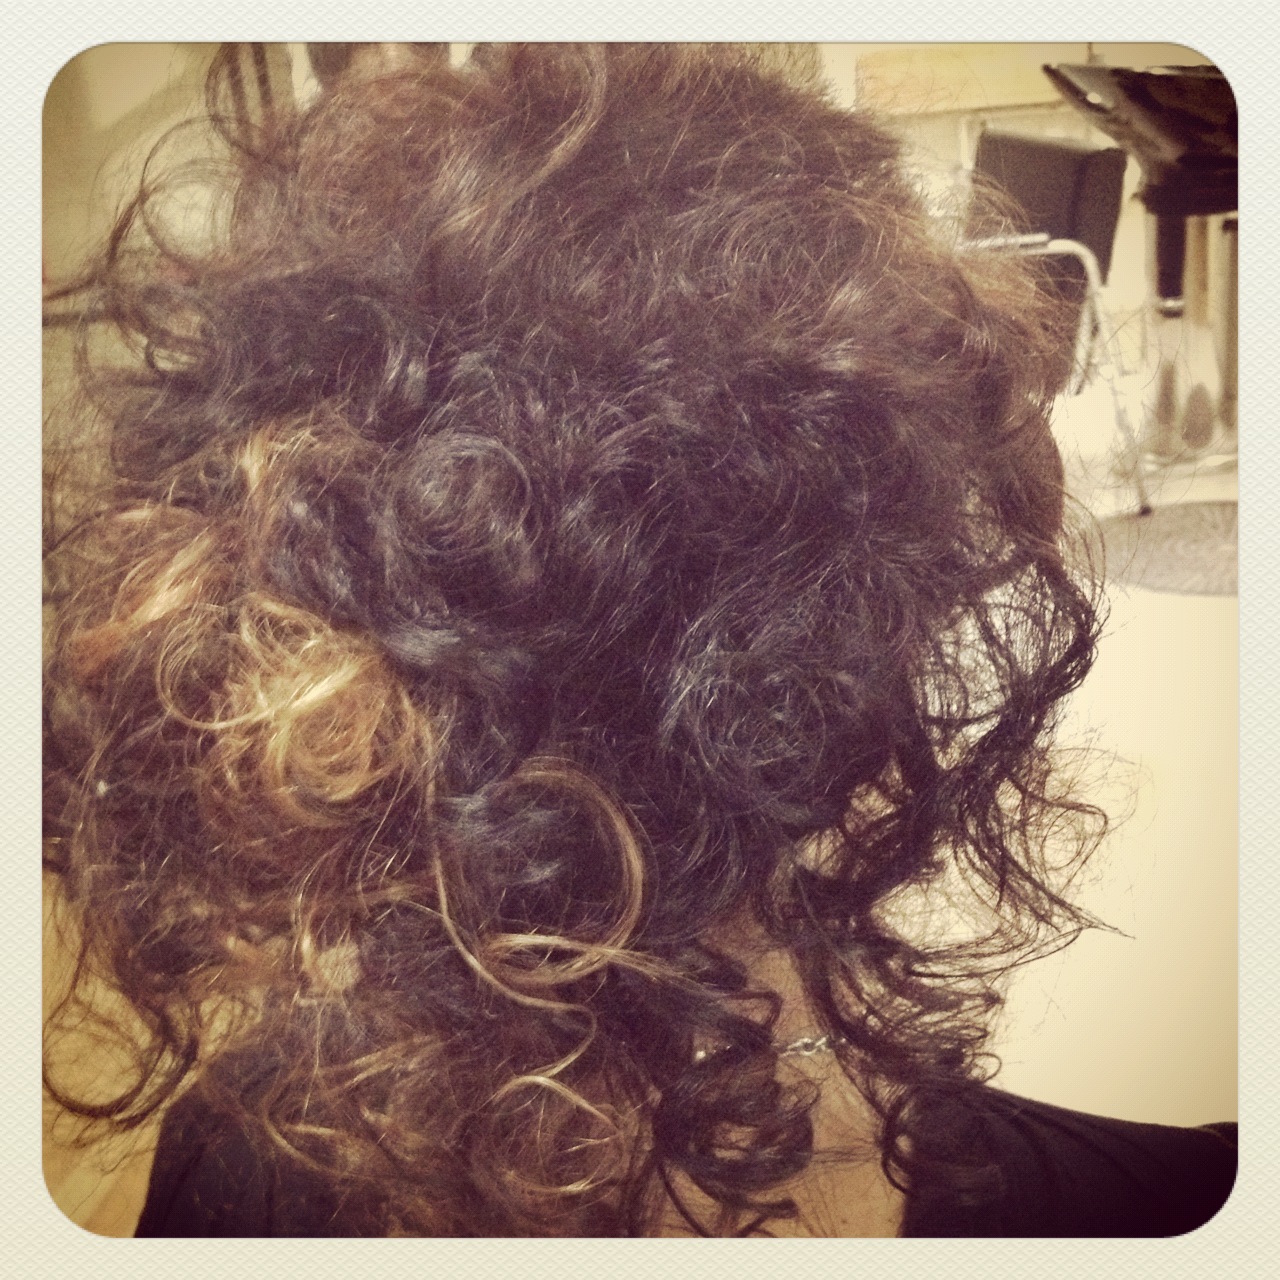
This is a little something I threw together for a client who is getting married soon and wants unbelievably big hair :) I LOVE, LOVE, LOVE big hair, so this was a treat to be able to tell her that her dreams of big hair were possible When I sat her down for her consultation and gave her "the talk" about how in most photos with long luxurious or big hair, there's a lot of hair there that's was added to create a look. As I like to say, "There's a whole lotta weave up in that mess!!!" Haha!!! So I showed her the "filler" I made, she looked at is sideways after which I reassured her that it was definitely going to work and we moved forward with the style.


Here's how I did it:


Materials Needed:
1 or 2 packs of braiding weave to match the hair color (cost $3-$5 a pack... no need to buy the good stuff!!)

netted wig cap or hair net (cost $1-$2)

wig brush/back combing brush ($.49-$5 depending on brand)

crafting thread ($3-$5)

crafting needle ($1-$2) Shhhh... I used my weave needle!! Ha!!!

scissors (Meh... I don't remember!! Ha!!)

  Step 1: Remove braiding weave from package being careful not to let the hair separate. Tie a knot in the hair mid way down the length to create two equal sections of braid-able hair.

Step 2: Combine the braid-able sections and separate them into 3 equal sections.

 Step 4: Backcomb the 3 equal sections you created.

 Step 5: Braid the 3 backcombed sections. When you get to the end, combine the ends of each section and back comb them together to finish the braid.

Step 6:  Take the braided weave and pack into the wig cap/hair net.


Step 7- Once the enclosure is sewn shut, cut off the excess wig cap/hair net.

 Step 8- Viola'!!! Your filler is now complete and ready to mount on someone's head :D Marvel in your aweosomeness and take a bow!!

This is the end result of Heather's updo practice for her big day. I back combed the front and crown sections, placed the filler in the area where volume was needed most. I sewed it in by placing her curled hair over the top, loosely stitching that in with the same black crafting thread and then picking up the remainder of her curls and stitching that in to the filler as well.

Beautiful right?!? I have to say, I was quite impressed with myself and my craftiness when I was done. Hopefully this is something you can apply to future crazy big updos or at home dos in place of crap tons of back combing. I think this is a great alternative to the God forsaken Bumpit and an easier to hide version of the loofa trick. Try it and let me know how it works out for you!!

Quick Tip: For an even more spectacularly voluminous look, add more hair to the hair net or make multiple fillers to pin or sew in.

Wednesday, November 28, 2012

So Far, So Good!!

I'm not sure quite why, but it still feels like I just opened yesterday. As I look back on the  month I can see that I've gotten a lot done despite these feelings of brand new-ness. I've been blessed with a group of great clients who have come in to see me and I've also seen a dramatic increase in clients I've seen for the first time. I can't explain why this is happening, or why the sudden influx of new interest but as a new business owner, I'll take it!!!

Indigo is evidence that going forward with confidence and taking the steps you know are right can only bring abundance and prosperity. This is not to say that I'm rollin' in dough but I definitely have a full heart and am currently rolllin' in support and love from my family, friends and community.

Thank you!!

With that said, please stay tuned. I've got it at the top of my list to take more pictures, blog more (hopefully) and send out tangible thanks to those who have been so supportive in this new journey of mine!!

Follow Indigo:

Facebook- www.facebook.com/indigo253
Twitter- @indigo253
Instagram- Indigo253
Pinterest- Indigo253

Notice a theme?!? Hehe!!! Follow away my friends!!!

Tuesday, November 20, 2012

Aussie Inspired Portland Goodness!!!

Boy has life been busy!!! With my recent visit to New York, teaching Davines classes and keeping my brain sane enough to keep business going with all the "stuff" that needs to be done, I've been running around like a crazy(er) person!!! Amongst the busy, I was able to make it to Kevin Murphy Runway to Reality ft David Bamford show in Portland that I feel like I've been waiting FOREVER for. I have to say, watching the creative mastery of David Bamford was enough to jump start my creative heart and get the juices flowing again. Stylists need ample opportunity to feed off the creative energy of others and I think this show provided enough to last me for quite a while.

David Bamford of Therapy Hair Studio is an Australian born stylist who works his magic out of Texas and is probably the most down to earth "cool hair guy" that I've had the pleasure of meeting. He said things like, "Add me on FB and don't worry, I'll be your friend.... cause I'm friends with everyone, I add everyone". He simplified looks that could very easily be over complicated and turned them into 20-30 minute easy to do looks. Philosophies on retailing and styling were shared and made easy to understand by a certain frankness that can only be accomplished by someone who's done to work to get where he is while keeping a humble heart and keen eye for growth in creativity.


I have since added David on Facebook, follow him on Instagram (his self proclaimed new obsession) and am itching to try out some of the new looks he taught (pictured above and to the left) while throwing my own Tacoma-esque spin on them!!! Yay for inspiration!!!!


Credits:
Pictures: Me and my iPhone :D
Hair: David Bamford
Makeup: I'm not sure but she did a fantastic job!!!


Thursday, November 8, 2012

Magic I Say!!!!

Oh Fall... The leaves have turned, the air is crisp with the promise of Winter and if you've got hair that tends to frizz, you hate this time of year!! Well, save the expletives and damning of the hair gods for another day AND get some Momo/Cream in your life. This tube may not look like much but speaking from experience, it's worth every single penny. This tube of magic is designed to infuse your hair with the most amount of moisture possible, protects you from UVA/UVB rays, keeps free radicals from doing damage and smells delicious!!

I've taken it upon myself to make sure that I apply this goodness to my hair just about daily and I am thoroughly amazed at how shiny and frizz-less my hair has been. With the weather being all Washington like, my hair's typical reaction is to freak out and fro. Momo/Cream keeps all this craziness under control....  Fo real!!! It is definitely quite magical!!!

Friday, November 2, 2012

I HEART CHALKBOARDS!!!!


Knowing that I have a limited budget for decor, I took it upon myself to hit up Pinterest for some easy DIY projects to spruce up my space AND keep me busy during down time. This first project I embarked on was a "5 Minute Frame Fix" on a DIY site called The Yellow Cape Cod. Honestly, this is only one of many projects that I found that I want to try but I chose this one first because it was easy and let's face it, I HEART CHALK BOARDS!!!! Now that I have a whole can of chalkboard paint, expect that many of the surfaces in Indigo will be coated with said awesomeness.


Ok... So here's how I did it:


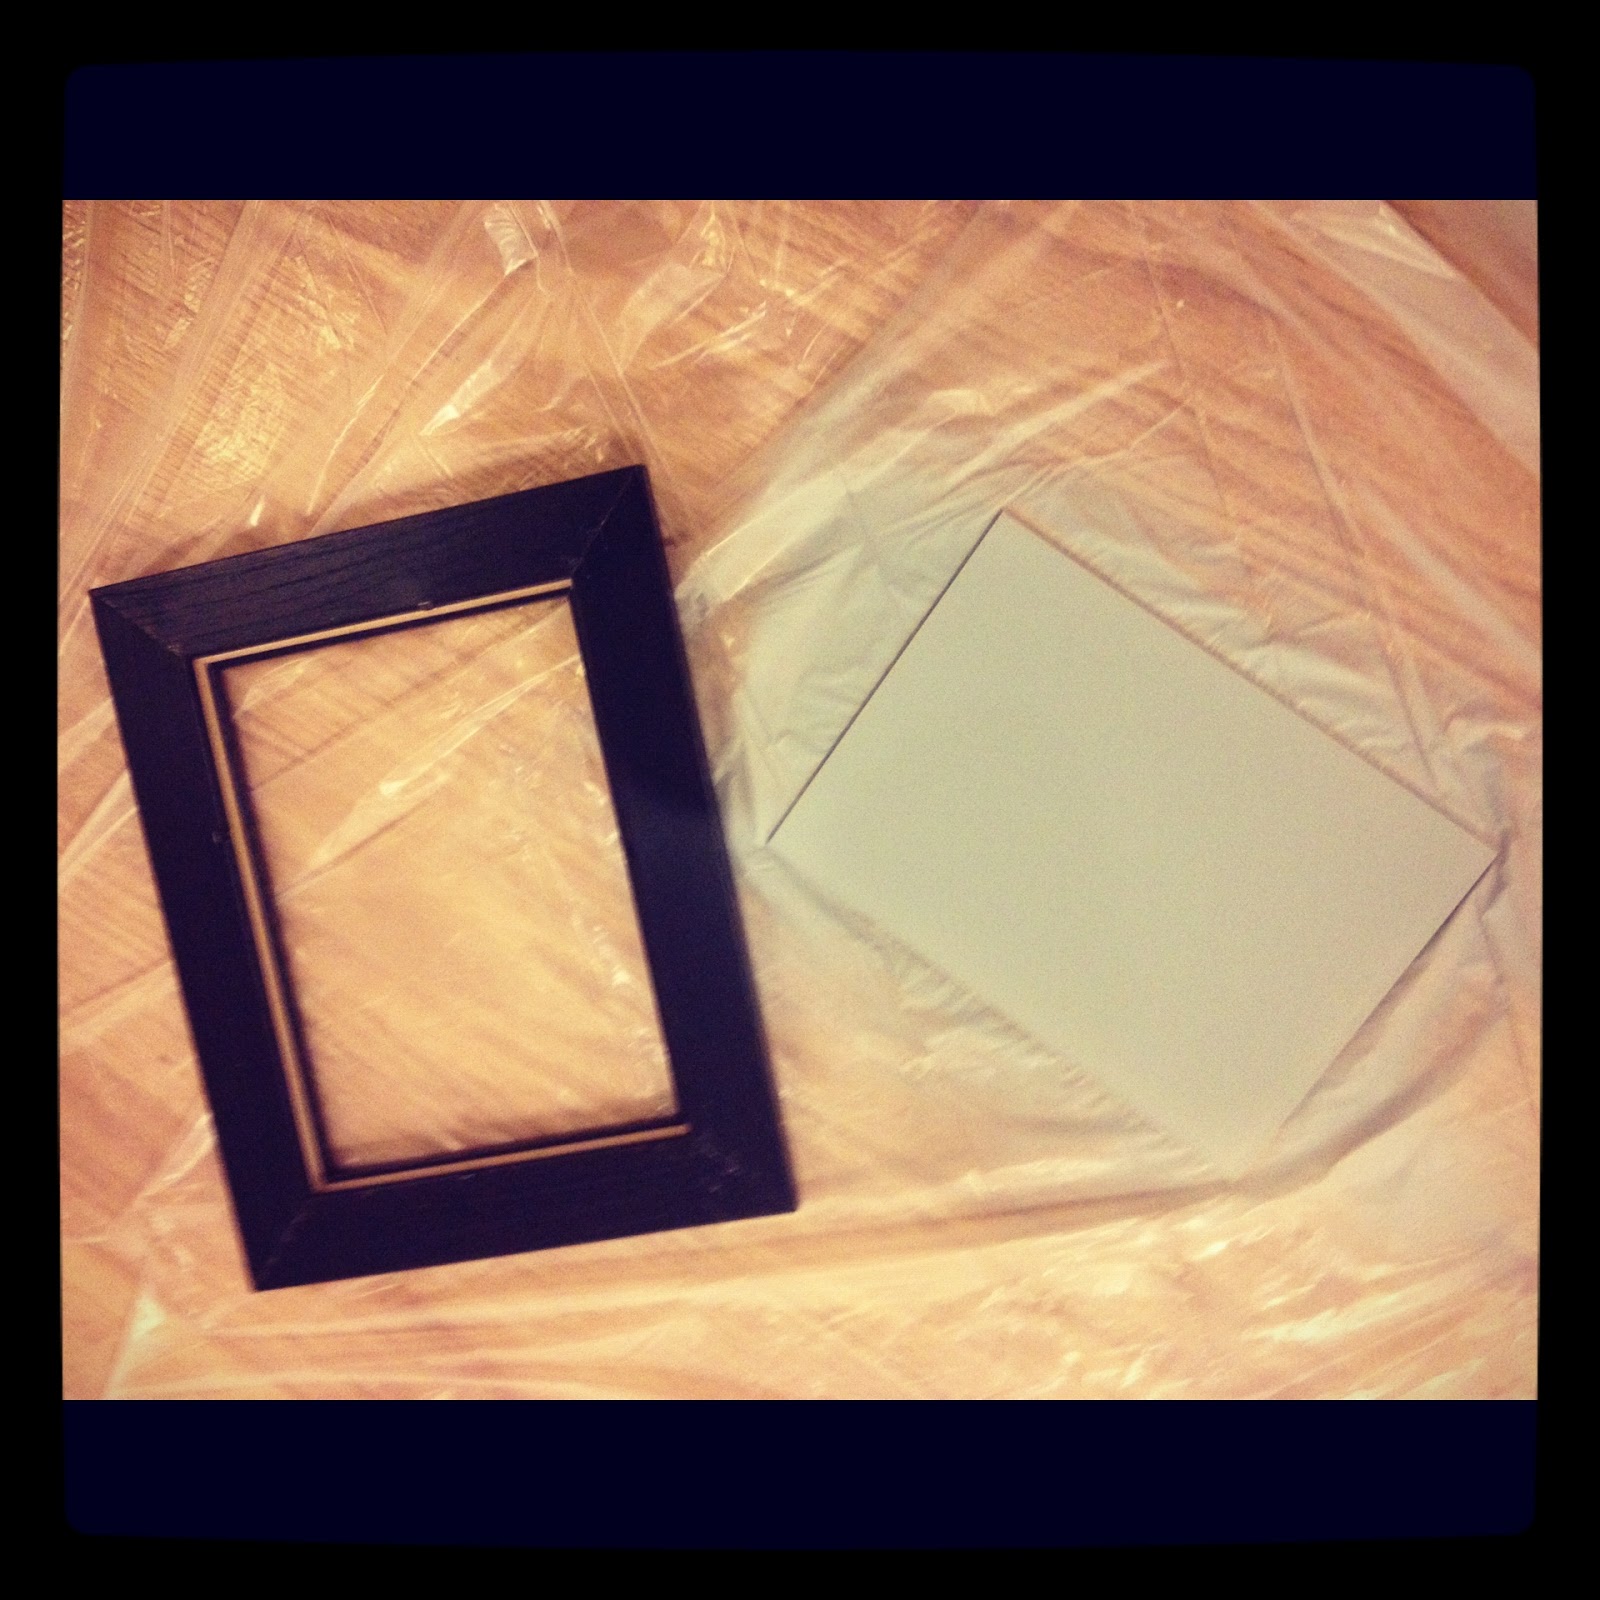
Step 1: Buy a picture frame!! Easy enough right?!? I chose this one because I couldn't find a vintage-y one that still had a paint-able surface like the original tutorial. This Ikea frame is perfect since all the pieces come in an easy to access package!! Ha!!


Step 2: Take the frame apart, prime and paint the glass with chalk board paint. To ensure an even surface, I used two coats of the chalk board paint.


Step 3: Once the chalk board paint is dry, put the frame back together. At first I was going to leave out the white piece but last minute decided to keep it cause it gives my lil DIY project a nice classy finish.


Step 4: Remember to bring your chalk with you so when you take a picture of the finished product you can write something cool on it to showcase your awesome project!! Haha!! I left my chalk at home so I'll have to wait until the next time I'm in the shop to write something clever.... I should be able to come up with something good!! ;)


Well, there you go!!! This was a really fun project that kept my self diagnosed ADD in check because I was able to do 5 other projects simultaneously while the coats of primer and paint were drying. Try this at home. I originally intended to make this an "open/closed/BRB" sign but I think I'm gonna set it on my station so I can bask in its awesomeness!!! Can't wait to write cool stuff on it!!!!